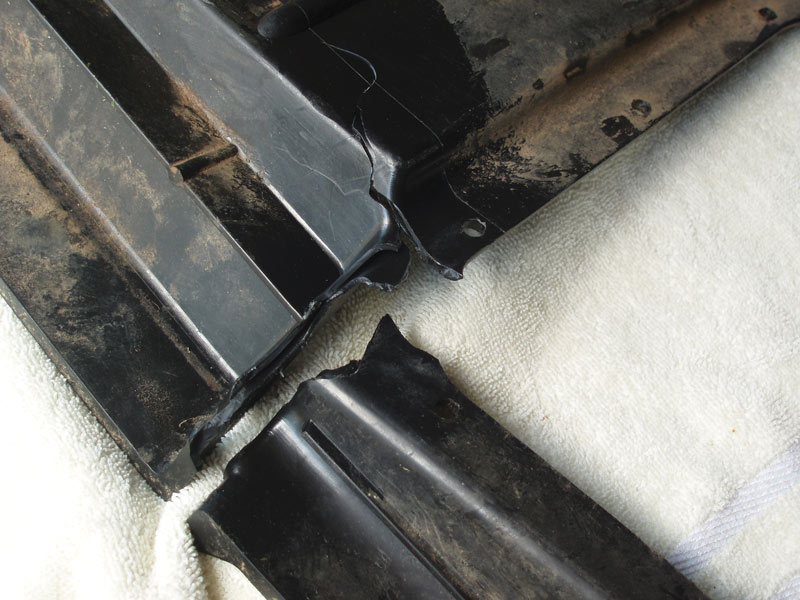
Old age and abuse had damaged the double-wall plastic top of this riding mower bagger lid. Photos by Scott R. Nesbitt
Two of our recent targets for repair were a clear plastic light-diffuser panel (similar to a taillight lens) from a ceiling fixture, and the plastic lid of a riding mower bagger attachment.
Super glue (cyanoacrylate) had failed to fix a foot-long section of the diffuser that had broken off the corner, where the diffuser forms a lip to hang off the fixture, so we tried the 5-Second Fix kit (as advertised on TV). It worked! The $10 kit (available from Wal-Mart and other retailers) comes with a tube of thin, clear liquid and a small, battery-powered ultraviolet (UV) light. Apply the liquid to both sides of a break, hold the pieces together, and shine the light on the joint. In a few seconds, the liquid will become a sturdy adhesive.
After we’d tacked the foot-long crack in a few spots, we placed the diffuser panel in the hot Georgia sun for four hours. Because sunlight includes UV rays, the liquid became solid. A month after the repair, the diffuser is hanging nicely on our fluorescent ceiling fixture. (Dentists use light-curing plastics to fill cavities, and there are many industrial applications. At the retail level, common brands are Bondic, Bondtastic and Lazer Bond.)
When it came to mending the broken bagger, however, this light-cure method proved unsuccessful, as the light was unable to penetrate the black plastic. The bagger’s surface was very smooth, and the adhesive that did harden on the surface peeled off, apparently for lack of “tooth” to grab.

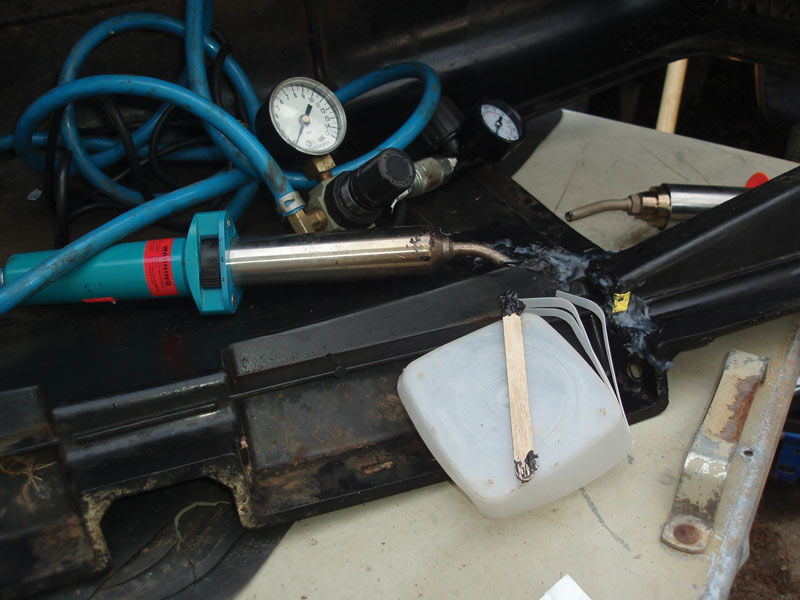
A rugged, unattractive — but durable — repair of the broken bagger was done with a hot-air plastic-welding rig fitted with a regulator designed for low-pressure output. Plastic from a food container provided filler material, and a wooden stick blended softened plastic across the crack. At right is the output tip of a second plastic welding tool.
For a job like this, you’ll need to identify the broken object’s plastic variety via the Resin Identification Code. These are numbers molded into most modern plastic products, and you can find a guide to determining what’s what on the Plastics Industry Association website. Find scrap plastic with the same code to use as your filler, or buy plastic welding rods. Our bagger was HDPE (high-density polyethylene). Plastic oil bottles bore the same number, but getting that material to soften took much more heat than the bagger’s plastic did. The best match was an HDPE food storage container.
Always test your materials before starting. All plastics should be cleaned with a water-based cleaner and rinsed well to keep unwanted chemicals and debris out of the weld.
We used a hot-air welder to fix the bagger. A trickle of air gets heated inside the welder and blows out gently to soften the plastic. It’s a delicate process. You need an air regulator with a very low range. The repair in the second photo was done with less than 1 pound per square inch, and thinner objects would need even lower pressure. To protect the low-pressure regulator, we mounted a standard regulator upstream, set to 5 psi. Wear eye protection and cotton or leather gloves; the barrel of the welding tube is very hot. The key to success is finding the right combination of airflow, temperature, and distance between the tool’s air outlet and the plastic.
My preferred technique is to soften the fractured area until it becomes like thick hair gel, then heat the filler so it melts and can drip into the crack. Add heat and filler to form a puddle, then swirl the material around with a wooden tool, such as a popsicle stick (avoid metal tools, which would absorb heat and stiffen the puddle).
Use clamps to keep the broken pieces steady while welding, and while letting the weld cool down and firm up. Done with care, the repair should be as strong — if not as pretty — as the original product.
Scott R. Nesbitt is a freelance writer and former GCSAA staff member. He lives in Cleveland, Ga.