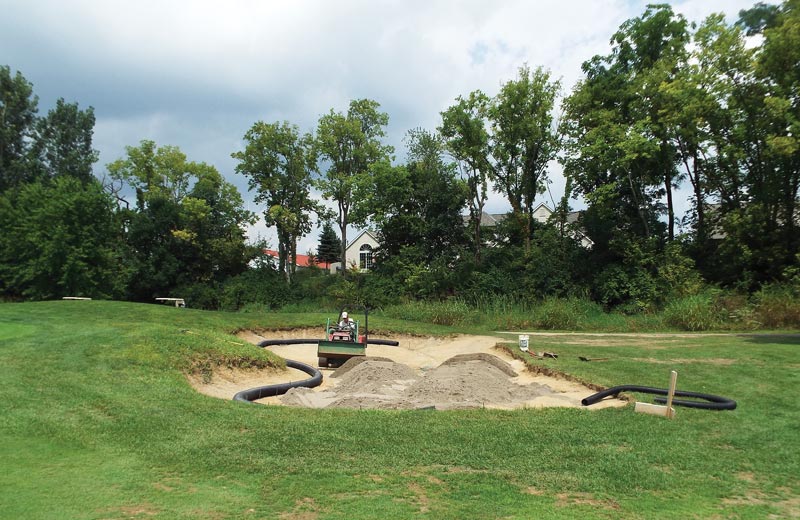
A greenside bunker on the 10th hole of Westchester Golf Course in Canal Winchester, Ohio, gets a renovation following a flood in 2017. Superintendent Mark Novotny, CGCS, has removed nearly half the course’s original 73 bunkers. Photos courtesy of Mark Novotny
Over the years, given a tightening budget, I’ve been removing bunkers here at Westchester Golf Course in Canal Winchester, Ohio, about 15 miles southeast of Columbus. The 18-hole semiprivate course was designed by Michael Hurdzan, with Bill Kerman as the lead architect. When the course opened in 1997, we had 73 bunkers, which was fairly typical at the time.
Those 73 bunkers occupied 2.02 acres, translating to about 1,520 tons of sand — by some standards, a manageable number of bunkers to maintain. In reality, though, with each bunker having a seven-year life span, we were renovating 10 bunkers per year, moving 217 tons of sand in and out. Fast-forward a few years, and 12 golf courses had been built within 20 miles of Westchester GC. The competition for golfers became even more evident when the economic downturn hit in 2008.
I’ve been at Westchester since its beginning, and we initially had about 32,000 labor hours per year. As each year passed, I was asked to reduce, reduce and reduce. Today, we target 16,000 hours. As the total number of hours spent in the bunkers decreased, the number of bunker-related complaints increased. We needed to curb the complaints by reducing the total amount of sand we were maintaining. (For me, as superintendent, it’s less important how many sand-filled craters are on the course. I’m concerned about the amount of sand filling those craters.)
Pinpoint the bunker’s purpose
Removing bunkers means sculpting the land for years to come, affecting every golfer’s perception of the course’s playability. The art of bunker removal comes in the planning and the understanding of why the architect placed a bunker in a location in the first place. Was it to prevent a lost ball and a penalty to help speed up play? Was it to protect an adjacent property? Was it for alignment? Was it for a penalty? Did those little trees finally grow up, and the bunker is now obsolete?
You must determine how eliminating a specific bunker will influence playability, as well as how you want the hole to play without the bunker — harder, easier or the same. Given that the complexity of the sand shot is being removed, I take other forms of challenge into consideration. (I’ve replaced a bunker with a mound to obscure the surface of the green, for example, and have increased the height on the green-bordering side of a bunker so the top of the flag isn’t visible.)
On a cold day in January 2010, I set out to visit Kerman at his office — fortunately, just 25 miles from Westchester GC — armed with copies of the layout of each hole. My goal was to cut the amount of sand at the course by 50 percent. My crew and I were only able to put about half the amount of time into the bunkers as was needed, so we came up with the 50 percent cut in sand based on that observation. Kerman helped me determine which bunkers could go or could be reduced without significantly impacting the difficulty of his original design.
If you don’t have access to the original designer, I’d recommend contacting a local golf course architect. Many would be happy to come out and give you a hand in assessing the situation. At a recent turf seminar, two architects kindly offered their assistance with bunker removal should I need it.
Prep for bunker removal
You have your strategy. Now, where to start? Pick the bunker that causes you the most grief — the one you hate walking into, the one your crew hates. (Ideally, this will be a bunker your golfers aren’t fond of either.)
Visit the bunker and take photos. It may be a muddy mess thanks to overdue renovation, lack of time to fix washouts, or financial restrictions that prevent just getting enough sand in the darn thing, but use your photos to visualize how you’d like the area to look when all is said and done. Adjusting the images in Photoshop or with another photo-editing tool can be helpful.


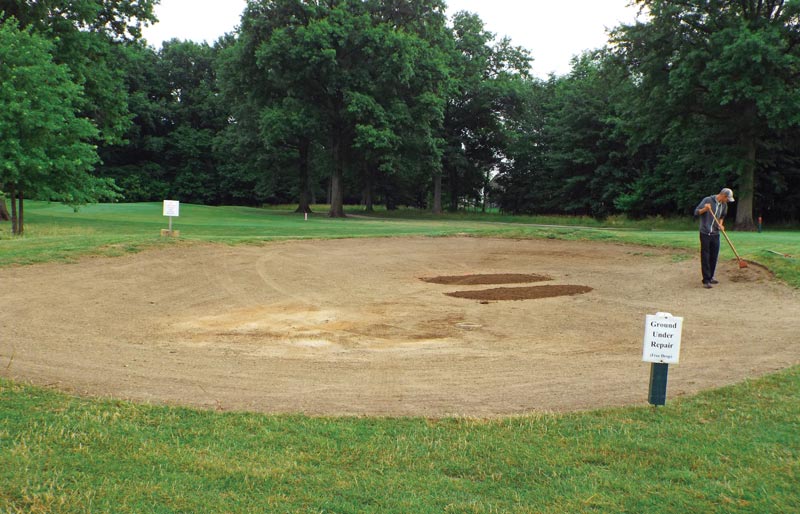
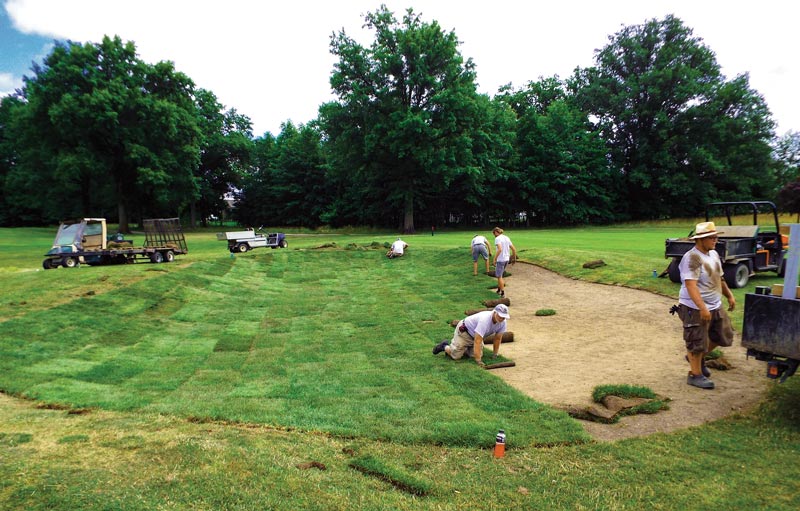
Final sod preparation (top) and sod installation (bottom) for a 2016 bunker removal project on Westchester’s fourth fairway.
For each bunker slated for elimination, you must decide whether to leave the depression, fill it in flat or mound it. Unless you put a flat spot where a bunker used to be, you’ll have slopes to contend with that, when the bunker was initially built, were not intended for golf cart traffic. You’ll be changing this space to an invited location for cart operation, so before beginning any work, consult your carts’ operators manual for the percent slope or angle degree for safe operation. Make sure your slopes are below that.
Now, what will it take to get the bunker you originally photographed to look like the final goal? You want to ensure that what you replace the bunker with will be lower-maintenance and that upkeep can be done with existing equipment. Take into consideration what equipment you already use to mow this area. In general, I try to make fairway bunkers softer for our rough mower. Greensides have more undulations, as we use smaller mowers. The point is: Don’t create a new job.
I treat every bunker project as its own small renovation, regardless of whether we’ll be replacing the sand or shifting to grass. In a nutshell, you’ll take out the old sand; remove, repair and replace the drainage; and edge the sides. At the end, consult the powers above you on whether to go with sand or no sand.
If no sand, bunker edges need to be transitioned to the bottom. We use an 8-foot-long, 1-by-2-inch piece of lumber as a straightedge to follow the existing slope to meet the bottom. Paint a hash mark, and while you’re there, put a level on the piece of lumber to check that the slope isn’t more than your carts’ maximum slope value for safe operation. If it’s too high, soften the slope until it meets your needs. Continue around the entire bunker until you have an outer fill area.
You can haul in new material to fill the area — it should match the existing material as closely as possible — or, at Westchester, we’ve shaved a steep but shallow slope using a tractor and rototiller, and this generates the needed material while also softening the slope. Such areas must be checked often until they’re sodded, to make sure the altered slope or grade can be easily maintained. A good mechanical sand rake operator is handy here to push the fluffy material where you need it. We’ve also used composted homemade topsoil made of silt, bunker sand and grass clippings rototilled together. We let it sit over the winter and rototill it again to create the “fluff” for fill and final grade.
Sod and see
Now it’s time for the fun stuff: getting dirty. With the contour prep done, bunker removal becomes a regular sod project. Do a final raking of the fluff, firm up the soil, fertilize beneath where the sod will lie, and install the sod in a straight-line pattern as much as possible. Your less-experienced staff members can lay the main sections while the veterans deal with the detailed cut-ins on the edges.
When laying sod to fill a bunker, I prefer to use as much of a full piece as possible on the edges adjacent to the existing turf on the upper edges of the slopes. The smaller pieces dry out too quickly on the slopes. We use the smaller pieces to finish the lower locations. When done sodding, get out the hoses and keep the area wet until it’s well rooted and can handle cart traffic. We’ve opened these renovated plots after just a couple of weeks, but we keep carts off them for a month or two.

So long, sand: A present-day view of an area on Westchester’s first fairway that was previously occupied by a bunker. The bunker was removed in 2014.
I limit the number of bunkers under repair at any given time to usually just one on each nine. We alternate starting nines daily and rotate the two projects to give us the maximum amount of time to work each day without affecting play. We set up barrier netting when we work if needed.
Our first ousted bunker was a steep-sided fairway bunker on No. 18. Rebuilding it after every downpour just wasn’t cost-effective. To date, we’ve removed 35 bunkers from Westchester GC. We’ve reduced the size of the remaining 38 bunkers, and they now have deeper sand to minimize washouts and gentle slopes for ride-on equipment. I estimate we’ve cut the amount of sand on the course by 40 percent, mowing time by 50 percent and raking manpower by 80 percent.
At first, golfers were skeptical about the course being as tough minus as many bunkers, but they’ve come to appreciate less sand in the remaining bunkers and those bunkers receiving better maintenance. My crew likes that they have way fewer washouts to deal with and less string trimmer work, and the pro shop likes that the number of complaints has dropped to zero. As for me, I sleep a lot better knowing that raking bunkers following an inch and a half of rain is no longer a weeklong process — just about half a day’s work.
Pre-bunker-removal checklist
- Understand the purpose of the bunker.
- Consult a golf course architect.
- Determine the desired effect on playability.
- Ensure the replacement is lower-maintenance and can be maintained with existing equipment.
- Ensure slopes are cart-friendly.
Mark Novotny, CGCS, is the superintendent at Westchester Golf Course in Canal Winchester, Ohio, where he has worked since 1996. A 30-year member of the association, Mark earned a scholarship from GCSAA in 1990 while attending Ohio State University for turfgrass management. He also holds a bachelor’s degree in business administration from Youngstown State University.