
To quickly resurrect its practice putting green, the crew at Wayzata (Minn.) Country Club covered it with a greenhouse bubble (top). Several weeks later (bottom), the bubble — and the dead grass — was a distant memory. Photos by Michael Cauley
One of the worst things to happen to a superintendent in a northern state is to come out of a brutal winter and discover a dead green. If there is any place in the continental U.S. that knows about brutal winters, it would be the state of Minnesota, and the death of a green was all too real earlier this year for a superintendent and his assistants at Wayzata Country Club.
Wayzata CC is a premiere 18-hole private country club located in Wayzata, Minn., about 10 miles west of Minneapolis. Robert Distel, GCSAA Class A superintendent at Wayzata for the past 17 years, along with his three assistants — me, Michael Cauley; Adam Beers; and Mike Havens — had a horrible discovery this past March when we pulled off the greens cover on the course’s practice putting green. As the cover was being removed, it became evident there was death. The smell of winterkill has been compared to that of rotten fruit, a garbage dumpster and countless other things, but once you smell it, you never forget it. The putting green was estimated to be more than 80% dead.
Dawn of the dead
Distel, a 21-year GCSAA member, and his assistants had attended the 2009 GCSAA Golf Industry Show and Educational Conference in New Orleans the first week in February. When we left, we were sitting happy and worry-free with about 8 inches of snow cover on the golf course. The week we returned, a freak winter thaw hit the Midwest, soaring daytime temperatures to the high 40s. During this time of year, the average temperature hovers around zero, so temperatures in the 40s were indeed hot for February.
This warm spell caused all the snow cover to melt and then refreeze at night as the temperature dropped back down to the teens. The higher temperatures lasted for about four days, just long enough to melt the snow cover. The thawing and refreezing of the snow and ice left about 4 inches of ice covering the putting green. Temperatures didn’t warm up again until mid-March, just long enough to allow the crew to remove the cover and discover the dead green.
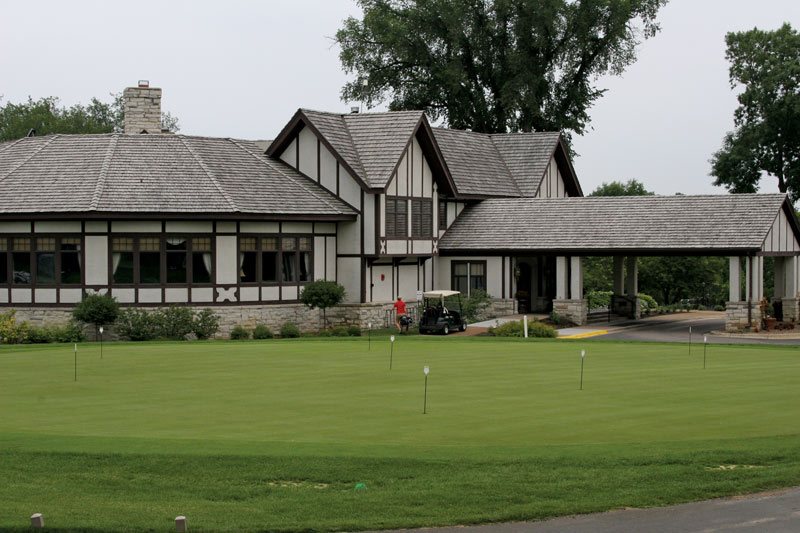
Some might consider the practice putting green to be the least important green on the golf course. That’s true as far as the game of golf, but Wayzata’s practice putting green sits right outside the clubhouse and in front of the driving range hitting deck — a dead putting green would be an eyesore for members and their guests. Imagine bringing a big client out for a round of golf and the first thing they see is a dead, smelly putting green. This particular practice green is vital to the image of the club.
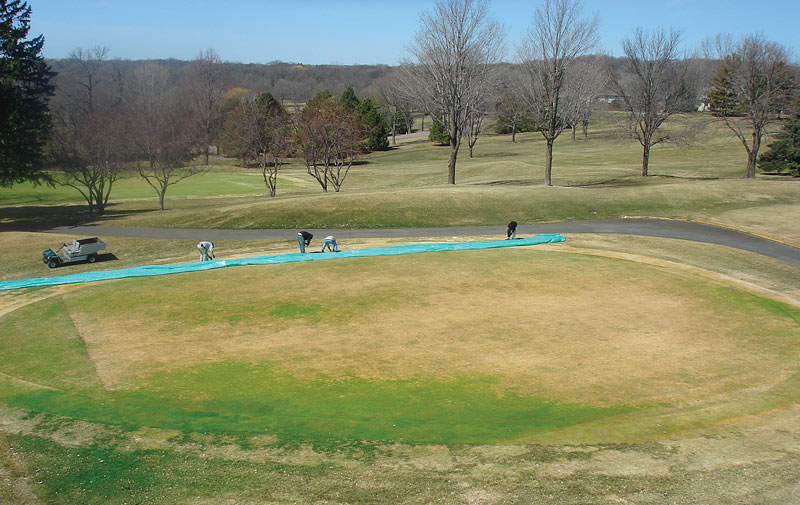
A look at the putting green before the greenhouse bubble project began shows how far the green came in a short period of time.
Now the question was, “How are we going to bring back this green?” The Wayzata team discussed waiting and reseeding in mid-May, when soil temperatures would be warmed up. Even if reseeded in May, the green would not be grown in and usable for another six weeks, and that would be only under perfect conditions. Waiting until mid- to late June was not an option.
We came up with our best idea: Change the environment of the green to allow seed growth in the first week of April. But how?
We decided to create a huge greenhouse bubble over the green.
Building a turf bubble
Distel, the veteran superintendent, had come up with and used the idea of a greenhouse bubble in the past, but on a smaller scale. Distel needed to work with his assistants to devise a plan to cover as much of the green as possible — at least the 80% dead portion, mainly focused in the middle of the green.
I was to head up the research and logistics of the project. My first task was to decide the size of the greenhouse bubble.
The actual size of the putting green measured 108 feet by 82 feet, measured at the two longest points. After several phone calls to many greenhouse plastic companies, construction supply stores and plastic sheeting specialty stores, we discovered that the largest sheet of plastic anyone had in stock and ready to ship was 80 feet by 80 feet. Therefore, the size of the bubble was determined based on efficiency — it was the largest size of plastic that could be ordered without getting a custom order, which would have cost a lot more and taken a lot more time.
The plastic we used to create the bubble was a 10-mil reinforced plastic sheeting. We went with the thicker plastic because of the large amount of air that would be enclosed within the bubble — it would take a lot of pressure to keep such a large sheet of plastic inflated. If we used a thinner plastic, the force would pop the seams or would just blow a hole in the plastic itself.
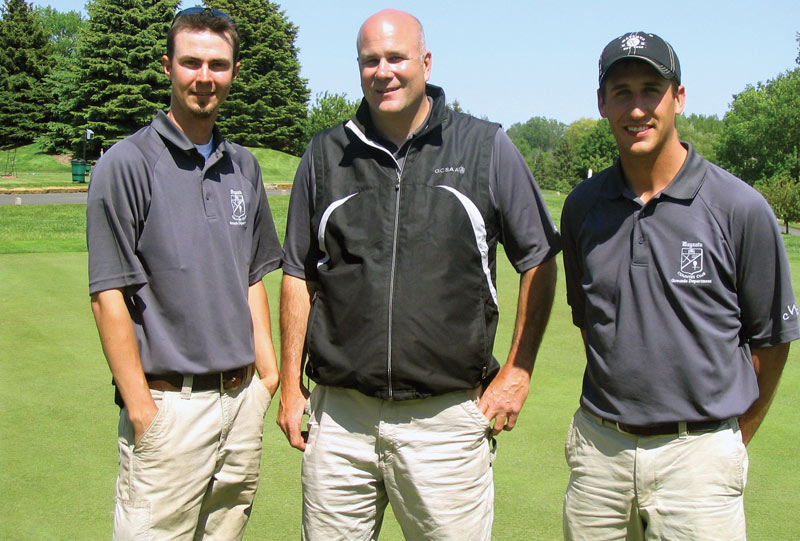
The crew at Wayzata Country Club includes (from left) the author, assistant superintendent Michael Cauley; superintendent Robert Distel; and assistant superintendent Mike Havens. (Assistant superintendent Adam Beers is not pictured.)
The problem with the stock piece of plastic was that it wasn’t large enough to cover the entire green. Given that the front section of the green had the least amount of winter damage, we decided to leave that area uncovered.
The next question was what kind and size of heater and fan unit would be needed to inflate a 6,400-square-foot sheet of plastic that weighed close to 300 pounds? Once again, after several phone calls and conversations with dealers in the area, we determined that a 500,000-Btu heater would effectively create the required heat to raise the temperature inside the bubble to the desired temperature and create the blower force needed to keep the plastic sheeting inflated. We rented the heater for a month.
Two more questions had to be solved before the Wayzata team was confident enough to go forward with the project. First, how could we hold down such a massive amount of heated air tight enough to the ground to prevent the air from escaping? Next, how would staff enter and exit the bubble to perform daily tasks such as watering, monitoring turf quality and recording the soil and air temperatures?
Distel, having previous experience with smaller bubbles, determined that the plastic would have to be held down with 6-inch sod staples placed every 2 inches. Because of the increase in size of this new bubble, extra precautions would be taken and 12-inch nails would be placed every 5 feet.
With previous smaller bubbles, the maintenance crew members entered and exited the bubbles by removing staples and sliding under the edge. This wasn’t viable this time, though, as there would be a far greater amount of air pressure inside this bubble, and this plastic was thicker and heavier. I came up with the idea of using a 24-inch drain culvert as an entrance and exit tube and placing a door on the inside that hung down. When it wasn’t in use as a door, the air pressure from inside of the bubble would keep the door pushed closed, sealing the bubble when not being monitored.
Prepping the green
Now that the logistics were worked out, the green itself needed attention. The green needed hours of prep work because of the significant amount of death. We came up with a list of procedures that we would perform on the green before the bubble would be erected, as well as what would have to happen once the bubble was up.
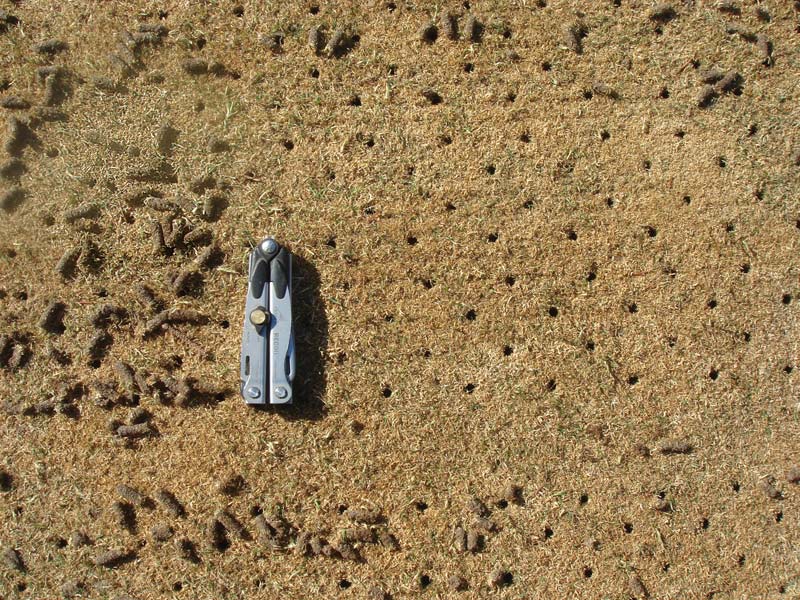
Prior to installing the bubble, the crew aerified the green so soil temperatures would rise quickly.
Prep for the green began on April 7, 2009. First, we verticut several times in several directions. We verticut for two reasons: first, to relieve the soil of all of the dead grass material that was still present; second, to create small grooves for the seed. We aerified the putting green using ¼-inch quad-tines with a 2-inch by 2-inch spacing. The aerification was done so that the soil temperatures would increase at a greater speed. We applied a medium-weight topdressing using a drop topdresser to give the seed a fresh seedbed. We then seeded using 007/Dominant X-Treme bentgrass seed. Seed was applied with a drop seeder at a double rate of 3 pounds per 1,000 square feet. The double rate was used to try and jump-start the seed with tons of seedlings, since we weren’t certain how the seed would react to the conditions in the bubble. The seed/soil mixture was then verticut once more to ensure the greatest amount of seed/soil contact. Finally, we watered and covered the green with a plastic greens cover for the night.
Enter the bio-dome
The big day was here. On April 8, 2009, the crew at Wayzata CC started off the morning by removing the cover placed on the putting green the day before. We unrolled the massive 6,400-square-foot plastic sheeting that would cover the green for what might be the next several weeks in an effort to bring a green back to life at a time when nature would not provide conditions to do such a thing.
The plastic was stretched out and then brought back in 6 inches, allowing the plastic to rise up in the middle. If the plastic was pulled tight all the way around, there would be no slack to allow the center to rise up more than a couple of feet off the ground. The Wayzata team wanted to get the middle of the bubble to a height of at least 5 feet to allow a person to move underneath.
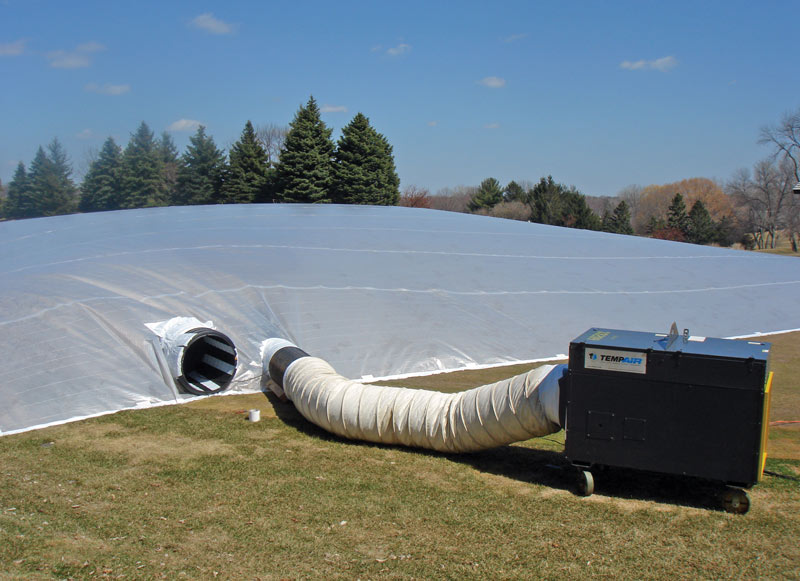
The Wayzata Country Club staff had two hurdles to overcome to get the bubble to work properly: installing a heater and fan, and finding a way to get in and out of the bubble. The doorway was a 24-inch drain culvert.
Sod staples were placed through the edge of the plastic at a spacing of about every foot. We didn’t know if bringing in the edges by 6 inches would give the proper height, and pulling out 3,000 staples would be a big hassle if the 6 inches didn’t create enough slack to give us the desired 5 feet. The door and blower tube were cut and taped inside the plastic to ensure that there were no leaks. The fan blower was then turned on and the plastic began to swell up.
Within about 20 minutes, the blower had pumped enough air into the bubble that the sod staples around the edge were pulling the plastic right up off the ground. For additional strength, we pounded in additional staples along with 12-inch nails at a spacing of 2 inches.
Burst their bubble
The problems soon began to pile up. The plastic was trying to lift off the ground like a hot air balloon. The blower fan only had one speed, so we had to figure out a way to lower the pressure inside the bubble without letting out too much air. The original plan called for vents to be cut into the plastic about 2 feet off of the ground to circulate the air and cause the hot air that would rise to the center to be pushed down to the turf floor. Four vents were cut into the plastic, one in each corner. The four vents were not enough, so we cut more vents. Eventually, a total of 18 vents were cut into the plastic to equalize the pressure of the fan blower.
The key to cutting vents into the plastic is to use fiberglass patches that are used on greens covers and to cut only three sides of the square-shaped patch. The patch prevents any further tearing of the plastic and the three sides make a flap. If too much air is escaping, the flap can be taped closed, recreating the pressure that was lost.
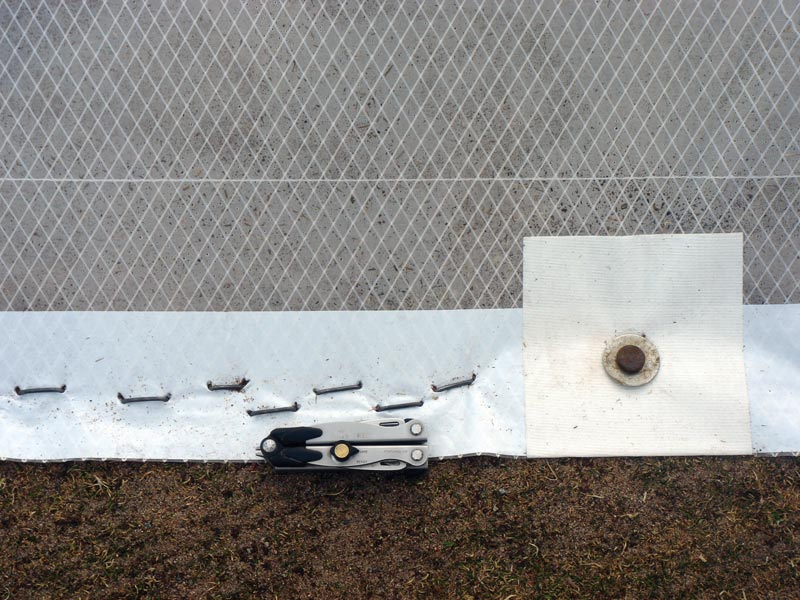
About 3,000 sod staples, along with hundreds of 12-inch nails, were used to keep the bubble fastened to the ground.
Once the bubble was somewhat stable, two ropes were placed across and over the top of the bubble to pull the center of the bubble down and prevent the balloon effect from happening again.
Another problem was the temperature controls. The heater came equipped with a thermostat on a 50-foot cable. Originally, we thought that the temperature inside the bubble had to be turned up high to allow for the heat to rise and hold up the plastic. As soon as the bubble was secured, the Wayzata team crawled through the tube to get inside the bubble. The door was great, flawless. But once inside, we realized the temperature was so hot that if left alone, we’d begin to cook the grass seed, not grow any.
The center of the bubble was measured to be about 12 feet tall, which was way too high. We brought it back down to an acceptable 7 feet. It was a balancing act of lowering the temperature on the thermostat so that the heater unit would blow enough heat to maintain the desired 85 F.
It took a grand total of about eight hours of tweaking before the bubble was totally self-sustaining and everyone could sleep at night without waking up every 10 minutes and worrying if we had burst our bubble.
Preventing Pythium
One advantage we had was our close proximity to the clubhouse — we could run a hose from an inside washbasin faucet to the bubble and have warm water. The use of warm water, aerification and an air temperature of 80 F allowed the soil temperatures to reach 68 F by the next morning. With a soil temperature of 65 F needed for bentgrass to begin germination, conditions inside the bubble were perfect for growing seed. Two dataloggers were placed inside the bubble to record air temperature and humidity every 30 minutes. Along with the dataloggers, an air thermostat and a soil temperature probe were placed inside so that air and soil temperatures could be monitored visually.
Over the next couple of days, the routine was minimal, but constant. A watering schedule was set up so that the soil remained moist, but not soaked. This meant we had to water about once every two hours with the warm water from the clubhouse. This continued through the weekend with people taking shifts to water the seedlings and monitor the temperatures.
On Monday, April 13, thoughts were creeping into everyone’s mind that the high temperatures, constant moisture and extreme humidity inside the bubble made the perfect recipe for fungi to form — more precisely, Pythium. The team met at the bubble to do the daily check and then discuss what should be done about the fungus concern.
We then entered the bubble to see an amazing sight — seedlings, everywhere! A bright green tint covered the surface that had been brown and dull since the removal of the greens cover. Even better, all of the grass that had not died was growing so fast and had gotten so tall, the bubble had to be taken down so the green could be mowed before the grass got too long.
Given that the bubble had to come down for mowing, it seemed like a great opportunity to spray for fungi and to apply a starter fertilizer to give everything a little more of a kick-start. We collapsed the bubble by turning off the blower and pulling up all 3,000-plus staples and nails. We folded the plastic over and rolled it off the green. We mowed the green with an 18-inch Toro 1000 greens mower at a height of 0.20 inch. The greens mower was equipped with a solid front roller to reduce the aggressive impact on the new seedlings.

After only a few days, the bubble had to be taken down so the grass that had not died could be mowed before it grew too long.
Once mowing was complete, the focus shifted to fungus control. We inspected several fungicides and read the labels to find the best combination and rate for applying chemical on new seedlings without adverse reactions, but with a heavy-hitting dose of Pythium control. We calibrated the sprayer to apply 2 gallons of liquid per 1,000 square feet. For Pythium control, we chose Disarm 480Sc at a rate of 2 ounces/1,000 square feet, Mefenoxam 2AQ at a rate of 0.5 ounces/1,000 square feet, and Chlorothalonil DF at a rate of 5 ounces/1,000 square feet. We sprayed the green and allowed the treatments to dry for about an hour. This combination seemed to cover all bases for fungus control. The fertilizer used was a 10-18-18 greens fertilizer applied at a rate of ½ pound nitrogen/1,000 square feet.
The bubble was reassembled and re-pressurized. Once all aspects of the bubble were stable, the bubble green was watered heavier than normal because of the fertilizer application. Normal watering and monitoring was maintained for the next two days.
Three days later
On April 16, the Wayzata team had its normal daily meeting inside the bubble. This time the meeting was different. The amount of growth that had taken place on the green was remarkable. The green tint of color that was present two days earlier had turned into a complete bright green that covered every square inch of the green. It was truly amazing.
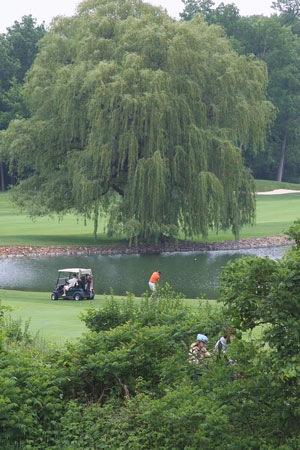
Right: Wayzata Country Club was designed by Robert Bruce Harris, with a recent redesign by John Fought. Last year, the course installed new tees and bunkers and improved the fairways and a stream that runs through the property.
We estimated the green was about 90% recovered and decided that it would be more work to keep the bubble on the green than if it were removed. The rate of growth under the bubble was so fast that the bubble would have to be taken down daily just to keep up with the mowing schedule required to keep the height down to an acceptable level.
That afternoon, the grounds crew removed the bubble from the putting green permanently. Distel, with the help of his assistants and crew, had brought an 80% dead putting green back to an estimated 90% living and vigorously growing putting green in just eight days. On top of that, we did it in the first half of April when average nightly temperatures were 28 F and average daytime temperatures were 46 F.
If there was ever a golf course management team that put their heads together, gathered their resources and put a plan into action for the benefit of a golf course green revival, this was it. Many golf courses experience challenges when coming out of a harsh winter, and this is one fantastic idea to help any superintendent who has a green that didn’t make it through the winter.
Michael Cauley is the assistant superintendent at Wayzata (Minn.) Country Club and a six-year member of GCSAA.